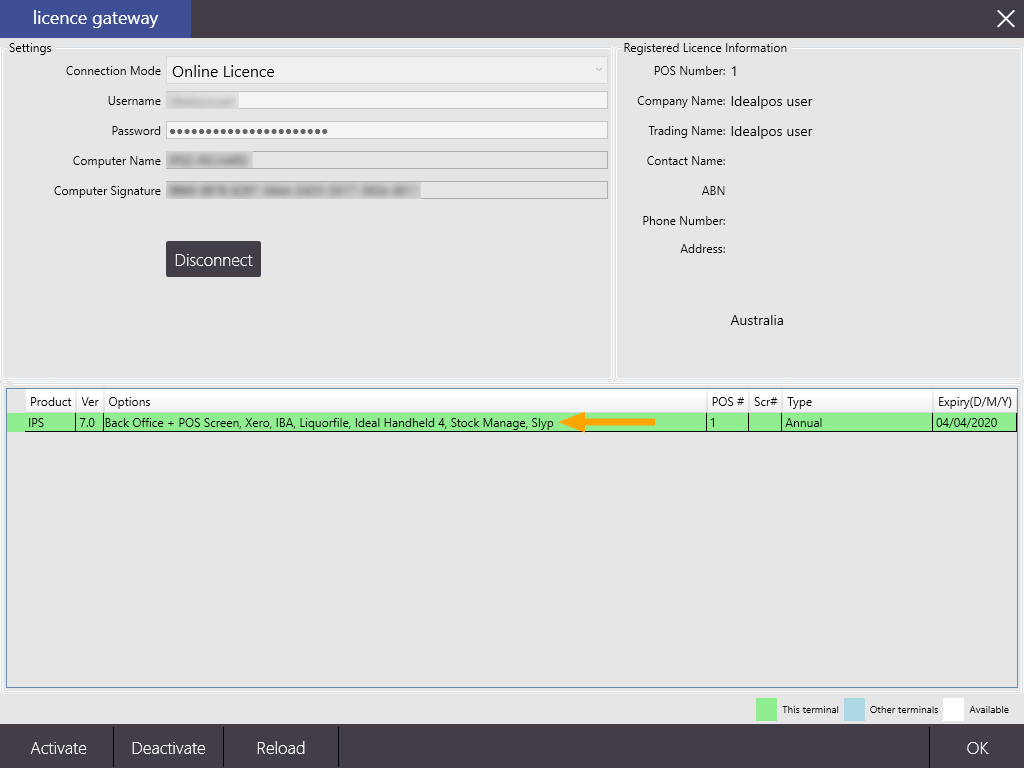
Once the Slyp module is enabled in the Licence Gateway, it can be enabled in Global Options.
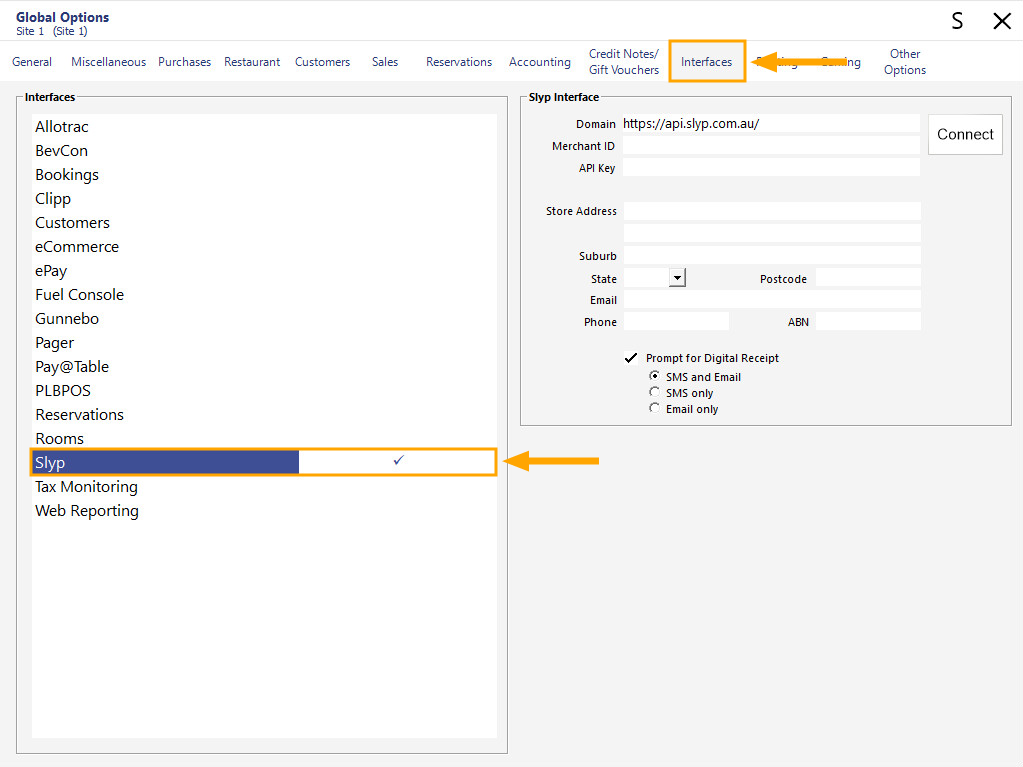
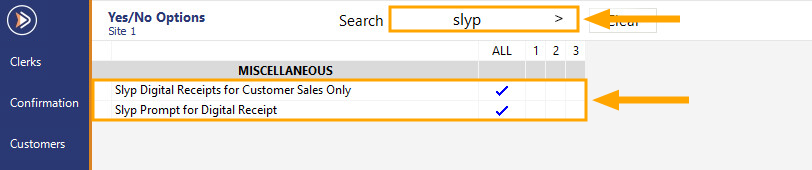
Go to Setup > Global Options > Interfaces > Select "Slyp"
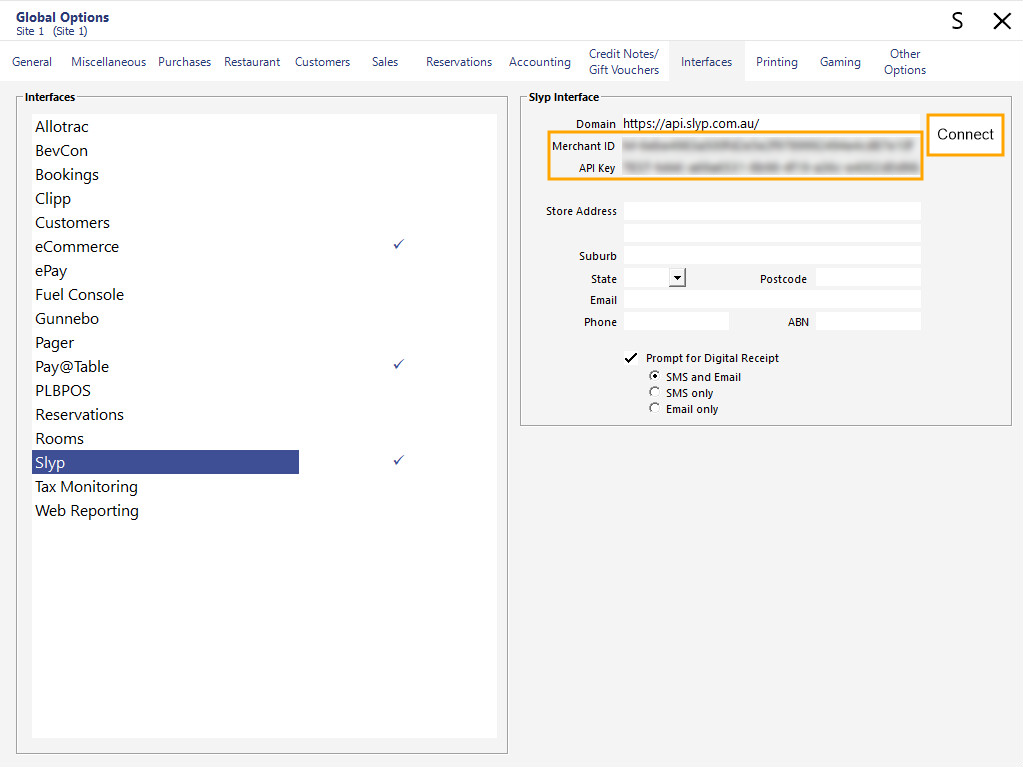
Enter the Merchant ID and API Key into their respective fields, then press the "Connect" button.
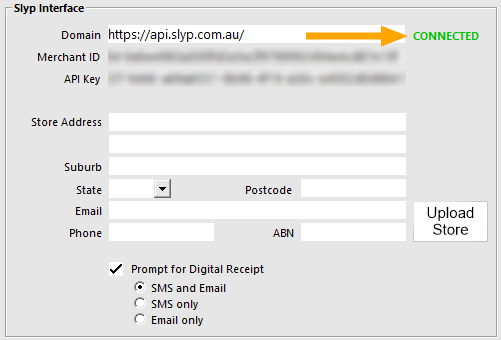
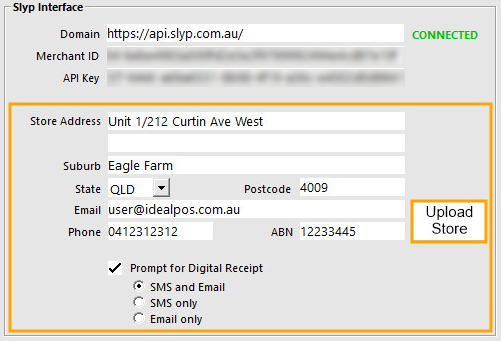
After a successful connection has been established, the Connect button will be replaced with text that shows "CONNECTED" in green which indicates that the connection is now active.
The next step involves Uploading your Store Details and specifying your preference for the Digital Receipt prompt.
The "Prompt for Digital Receipt" checkbox will control whether a prompt for digital receipt is displayed at the end of the sale.
The options available as follows will control the fields that are available on the receipt prompt:
- SMS and Email - Selecting this option will allow the operator to enter either a Mobile Phone Number to SMS the receipt to or to enter an email address to email a copy of the receipt.
- SMS only - Selecting this option will only display a Mobile Phone Number field to SMS a copy of the receipt
- Email only - Selecting this option will only display an Email field to send an email copy of the receipt.
Once these options have been configured, press the "Upload Store" button.
Close the Global Options window to save the changes.
To ensure that the Slyp options have been applied, we recommend restarting Idealpos.
Use IPSUtils to close the Idealpos Suite, then start Idealpos using the desktop shortcut or alternatively, press the Windows Start button and go to Idealpos > Idealpos.
Idealpos is now ready to send Digital Receipts via the Slyp Integration.
For more details on how to use the Slyp Integration to send a digital receipt, refer to Sending Digital Receipts using Slyp.